Topics important to people aged 55 and better such as "right"sizing, interior decorating, building a new home, lifestyle and more from McKee Builders, builders of active adult resort communities and diversified real estate development.
Showing posts with label active adult homes in DE. Show all posts
Showing posts with label active adult homes in DE. Show all posts
Looking to get active while living at The Courtyards at Brandywine 55+ community in Wilmington, Delaware. Check out the local YMCA, located at 3 Mount Lebanon Rd, in Wilmington. The Local Y is a great place to get fit and make some friends. Invite your neighbors to join you or bring your family! for more information, check out their website at www.ymcade.org.
Champions' Club's beautiful Kipling model is a new option at the
community. Offering a spacious
kitchen, front porch, two-car garage, and optional finished loft and basement. The Kipling is
customizable and low maintenance, starting at $277,900 for 1,544 square
feet of space.
For more information, check out our website here, or give us a call at 302-698-5601.
KITCHEN
The Kipling comes with a state of the art kitchen, equipped with Maytag
appliances, a spacious and beautiful center island, quality wood cabinets, and
easy-to-clean and-care-for counter-tops and wood floors.
GREAT ROOM
The Kipling's great room is a beautiful expanse, with an optional fireplace. It's the perfect space to host
parties, and relax with friends and family, thanks to its seamless flow into the dining area and kitchen.
MASTER SUITE
The Kipling's master suite offers a spacious
layout, a beautiful en suite bathroom, attached laundry room, and a walk-in closet.
BATHROOMS
The
Kipling's bathrooms are styled with furniture grade vanities in a
variety of colors, cultured marble tops, large mirrors, and Hollywood
strip lighting, so you can look and feel your best every day. OPTIONAL FINISHED LOFT AND/OR BASEMENT
The Kipling is customizable, with an optional loft and/or basement. Use this extra space for bedrooms, office space, or extra
storage. This extra space can be finished with an extra
room and a full bathroom.
...
AND MUCH, MUCH MORE
Champions'
Club is a 55+ active adult community located in Magnolia,
Delaware. Champions' Club offers a clubhouse with an outdoor heated
pool, tennis court, bocce courts, a gym, billiards, community garden and horseshoe pits.
Get Active, Get Moving, Get to Champions' Club.
Winter is
upon us, and it’s time to start hibernating in your home. Well don’t worry, we’ve
done some research and found a few beverages to help keep you warm. Many of
these options can be made with or without alcohol. There’s something for
everyone! Be sure to check out our website here for information on our developments and homes!
Mulled Wine
Click here
for complete instructions from the creator of this recipe.
Ingredients:
1 (750 ml) bottle red wine1 orange, sliced
1/4 cup brandy (optional)
1/4 cup honey or sugar
8 whole cloves
2 cinnamon sticks
2 star anise
Directions:
Combine all ingredients in a non-aluminum saucepan, and bring to a
simmer over medium-high heat. Reduce heat to medium-low, and let simmer
for at least 15 minutes. Strain, and serve warm. You can also place the oranges, cloves, cinnamon, and star anise in a
cheesecloth. Then simply strain and pull out the bundle when ready.
*For an alcohol-free option, try using apple cider instead of wine and
brandy! If you do this you can skip adding the honey or sugar. Another
alternative would be to use mulling spice in the apple cider, instead of the
individual spices
Kahlua Hot Chocolate
Click here
for complete instructions from the creator of this recipe.
In a medium saucepan,
combine milk, sugar, cocoa powder, cinnamon and nutmeg over medium heat until
heated through, about 2-3 minutes. Remove from heat and stir in Kahlúa.
Serve immediately,
garnished with mini marshmallows, salted caramel and chocolate syrup, if
desired.
*For an
alcohol-free version, just skip the Kahlua!
Sparkling Apple Cider Sangria
Click here
for complete instructions from the creator of this recipe.
Ingredients:
2 apples, peeled, cored and thinly sliced
1/2 cup cognac
2 cups apple cider
750ml bottle cava (or other dry sparkling wine),
chilled
1/4 cup pomegranate seeds
Directions:
Add
the apples to a large pitcher reserving about 1/2 cup for garnishing. Add the
cognac, apple cider, and chilled cava. Stir.
Fill
the pitcher with ice. Pour the sangria into glasses filled with ice and top
with sliced apple and pomegranate seeds.
*For
an alcohol-free version, just skip the cognac and use seltzer water or
sparkling cider instead of the sparkling wine!
We hope these beverages help bring some warmth and fun into
your home this winter. Please comment below with how these drinks turned out
for you! We would love to hear your favorite winter refreshments and share them
with the rest of our followers as well!
For more fun drinks, check out the full list here!
Are you looking for a way to enjoy your new back yard with
your friends, family, and neighbors? Try out some of these Do-It-Yourself
outdoor game ideas! They’re easy to make at home with your loved ones, and
available in stores and online. So go ahead! Mix up your favorite cocktail from
our previous post, and get outside and play! And kids, make sure you have a
parent to help you be safe with all the appropriate safety tools while making
these great games.
Cornhole/Bag-O
Materials:
½”
chick plywood sheet, 4’x4’
Four
2’x4’s, 8’ long
Four
4”x3/8” carriage bolts
Four
3/8” flat washers
Four
3/8” wing nuts
1 box
2 ½ inch wood screws
Chop
saw
Jigsaw
Compass
Drill
and bits
Clamps
(or another person to help)
Palm
sander
Safety
Goggles
Paint
(optional)
Preparation/Directions:
Cut
plywood sheet in half to make two 2’x4’ boards.
Take
the four 8’ long 2’x4’s
Cut
4 pieces 21” long
Cut
4 pieces 4’ long (two boards in half)
Cut
4 pieces 11 ½” long (for legs)
For
assembly instruction please follow the links here.
Bananagrams
Materials (for basic
tiles):
Big
sheet masonite OR
100 x
15mm x 1.5m fence palings AND
Dulux
Weathershield Low Sheen in Black and Vivid White
For tile holders:
6
timber pegs
7mmx5m
nylong rope or cord
Breakdown of letters:
Paling
(100 Tiles):
1: J, W, K, V, X, Z, W
2: Y, F, B, G
3: H, M, P
4: U, D
5: C, L, S
7: N, T, O, I, R
8: A
10: E
Masonite
(144 Tiles):
2: J, K, Q, X, Z
3: B, C, F, H, M, P, V, W, Y
4: G
5: L
6: D, S, U
8: N
9: T, R
11: O
12: I
13: A
18: E
Preparation/Directions:
Cut
palings or masonite into large squares
Paint
letters large enough to fill up the entire tile
Don’t hesitate to mix and match these two methods of
creating this fun word game! The Masonite tiles are a bit easier and make more;
the palings seem a bit more durable or heavy-duty.
Ladder
Golf
Materials:
¾” PVC
Piping:
Nine
2’ pieces
Six
1’ pieces
Six
standard T fittings
Six
elbows (or standard 90 joints)
15
feet of nylon rope/cord
12
tennis balls
Drill
(with a 5/16″ bit) or box cutter/knife
Paper
clip
Lighter
Paint
(optional)
Preparation/Directions:
Build
stand by creating a rectangle using 6 of the 2’ pieces, 2 standard T
fittings (for the long side) and 4 elbow
Build
three ladders
Use
3 2’ pieces, attach elbows to both ends of one piece
Attach
two 1’ pieces to each elbow
Repeat
steps to make two more ladders, using T fittings instead of elbows
Attach
all three ladders by the T fittings and insert into base
Create
tennis-ball bolas
Drill
holes all the way through tennis balls using a drill or box cutter
It
may be helpful to indent ball with smaller drill bit or the knife before
beginning to drill.
Cut
six 25” pieces of cord and seal ends using a lighter
Use
large paper clip as a needle to thread cord through tennis ball.
Tie
a knot in the end of the rope, and on the long end on the other side of
the ball
Repeat
step, placing one ball on each end of the cord for 6 bolas.
That’s
it! If you want to paint your ladders or bola you can do so with any colors
you like! Pain ladders before assembly for clean lines. You can also glue
pieces together for a sturdier game.
For
complete instructions and step-by-step photos, click here
Urban Horseshoes
Materials:
Four
16” 2x4s
Four
13” 2x4s
Two
16” squares of plywood, any thickness you want (3/8” suggested)
Two 3”
PVC couplings
Eight
½” Washers (or whatever size you want)
Wood
Screws (6x3/4 for base, 2x8 for frame)
Glue/wood
putty (optional)
Paint
(optional)
Preparation/Directions:
It
may be hard to believe but this game is a bit more difficult to make than
the others due to its relatively small size
You
are basically making two small boxes using four pieces of 2”x4”s and
plywood with PVC in the middle to catch the washers
You
can paint the washers and boxes to make them more fun and personal!
Check
out this link
for all these games and more! Get creative and have fun with friends and family
not only playing these games, but also building them with your own two hands
and giving them your own personal touches using paint and other customizations.
Let us know how they work out for you! We would love to see your pictures!
Creative Ways to Preserve Your Summer
Vacation Memories:
Pictures and
keepsakes from vacations are always fun for reminiscing.If you are like me, you always have the best
intention to organize, create and save those treasured memories. Scrap books and photo albums are always a
great way to keep memories alive, but I thought:there has to be something I can create that
could also act as an accent to my home or as artwork.So, I
perused a few websites and found some ideas I would like to share.These are simple but creative and make a
great conversation piece too!
Shadow Boxes
Step1
Create your background using theAlphabet Framestemplates. These are so perfect for shadow box displays since
they allow you to use several photos while maintaining a simple and clean
looking display. I also recommend thinking outside the box on the words you
use.
Step2
Remove the label inside the shadow box and attach your 12×12 print using the
double sided tape.
Step 3: Begin creating simple displays for some of your
items. I wanted to include airline ticket stubs from each of the members of my
family. I used a small clothespin to hold them and hot glued that clothespin
directly to my 12×12 print. We had just a bit of sand from two of our favorite
beaches to include as well. I used old lab beakers (turned upside down) to hold
my sand. I also included little flag labels made from paper and toothpicks to
designate the origin of the sand. If you can’t find old beakers you could use
spice containers for a similar look.
Step 4: Tilt the shadowbox and begin placing your
keepsakes inside. After putting in my sand beakers, I added shells and rocks.
Once all your items are inside you can close the shadow box.


 Champions' Club's beautiful Kipling model is a new option at the
community. Offering a spacious
Champions' Club's beautiful Kipling model is a new option at the
community. Offering a spacious 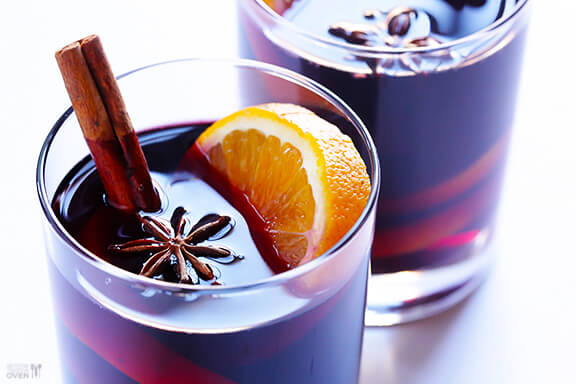
 Ingredients:


